Pair with Zwift
TL;DR
Start the app and pick your controller. In Zwift's Paired Devices screen, choose Voltage Gamepad as the Power Source for a moment. Then choose Voltage Gamepad under Controls. Finally, set Power Source back to your trainer. The first time, Zwift also runs a short Zwift Ride tutorial.
The app shows up in Zwift as a Zwift Ride controller named Voltage Gamepad. You connect to it on Zwift's Paired Devices screen.
Same computer or a different device?
Both work.
- Same computer: run the app and Zwift on the same Windows PC.
- Different devices: run the app on a Windows PC and Zwift on another device, such as a Mac, tablet, phone or Apple TV. Both devices must be on the same local network (for example the same home Wi-Fi).
Step by step
1. Start the app and pick your controller
Start Game Controller for Zwift and choose your controller from the list (see Install and first run). Keep the app running while you ride.
2. Open the Paired Devices screen
Start Zwift and go to the Paired Devices screen. Your trainer already shows as Connected, but the Controls tile still says Search.
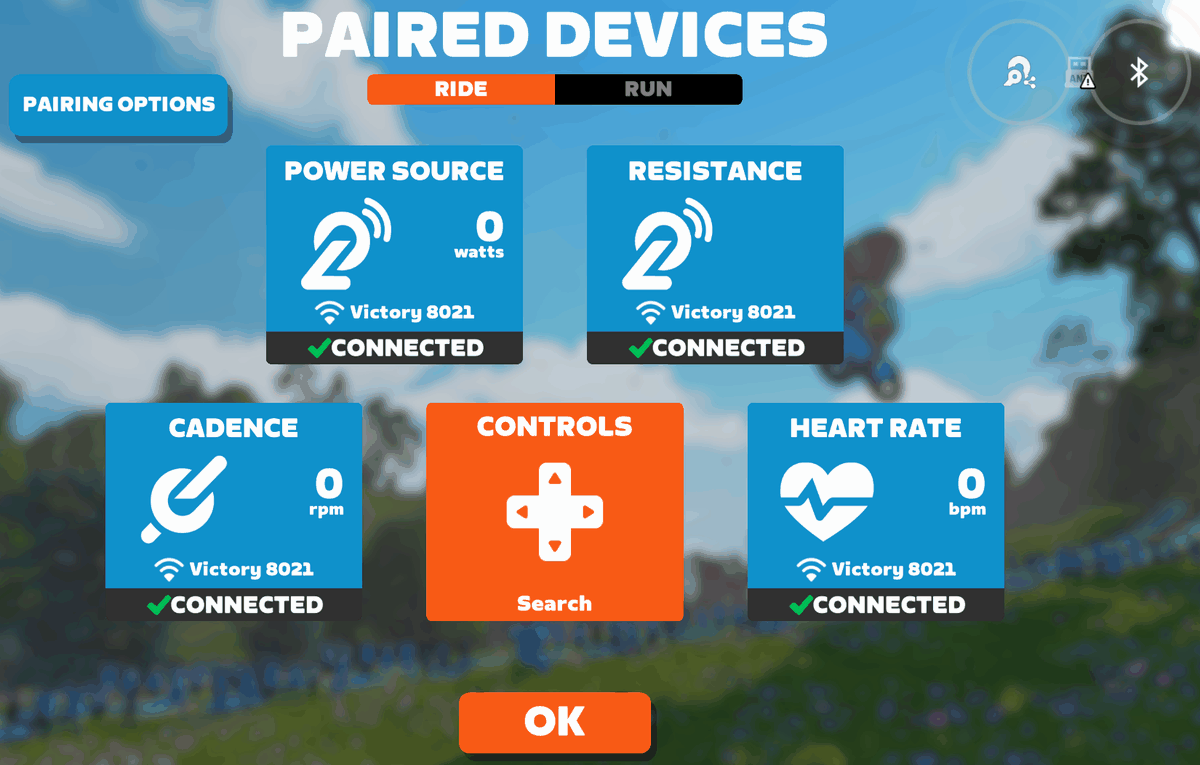
3. Pick Voltage Gamepad as the Power Source
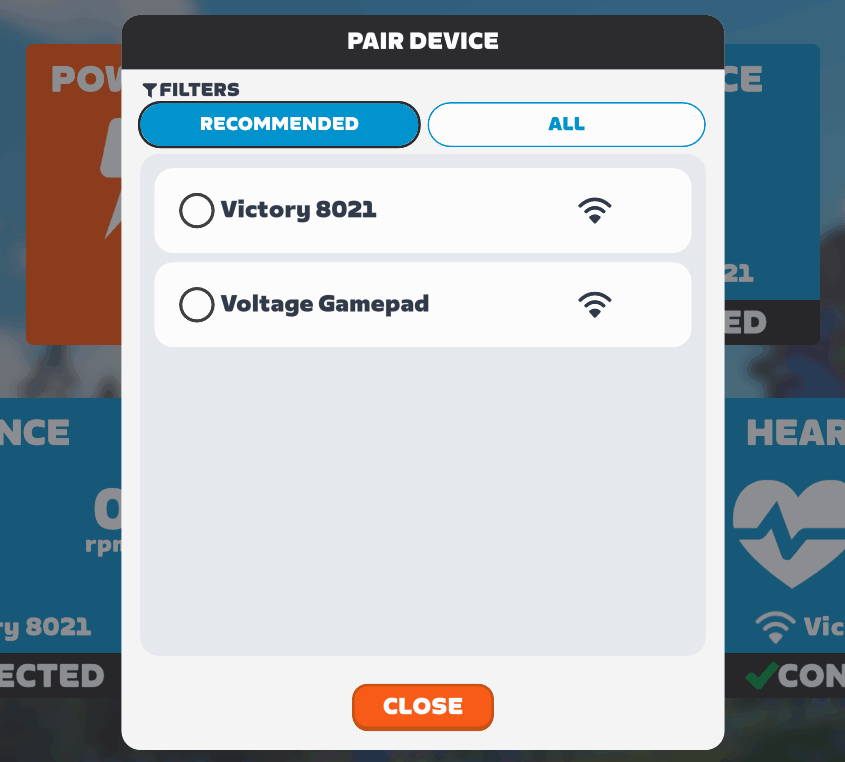
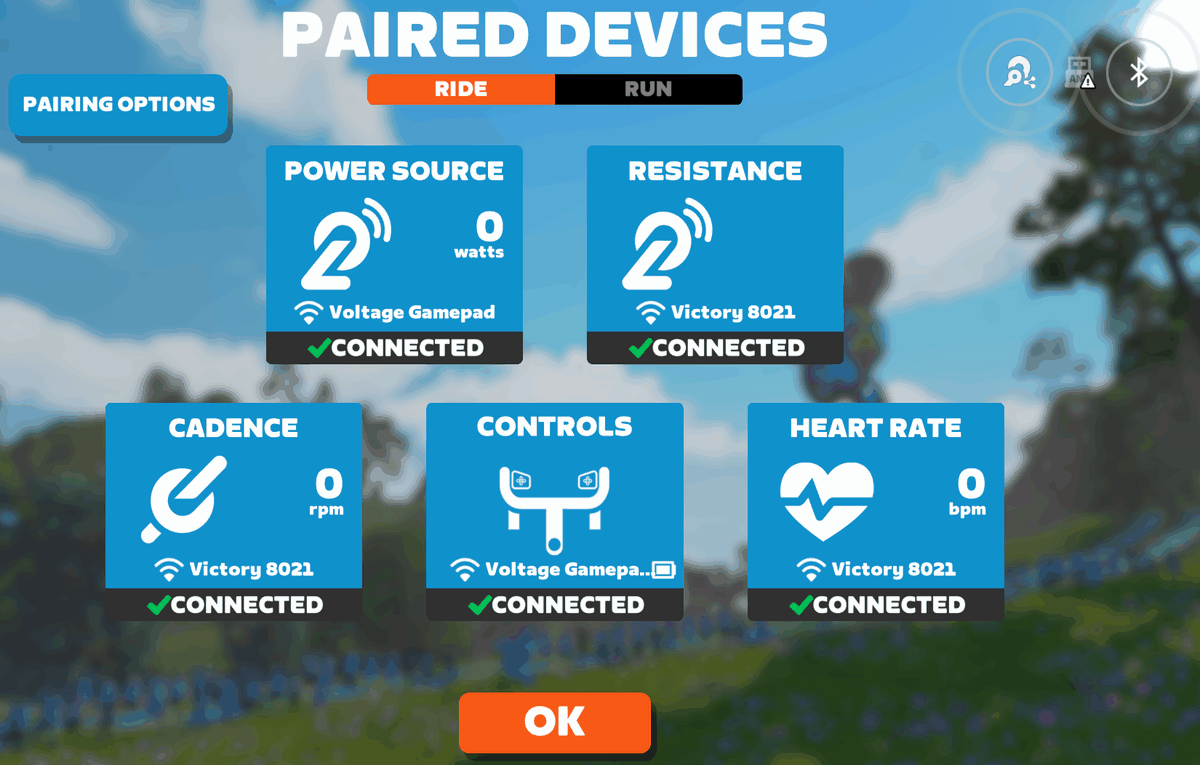
Click the Power Source tile. The Pair Device list opens. Select Voltage Gamepad, then click Close.
4. Check the Power Source tile
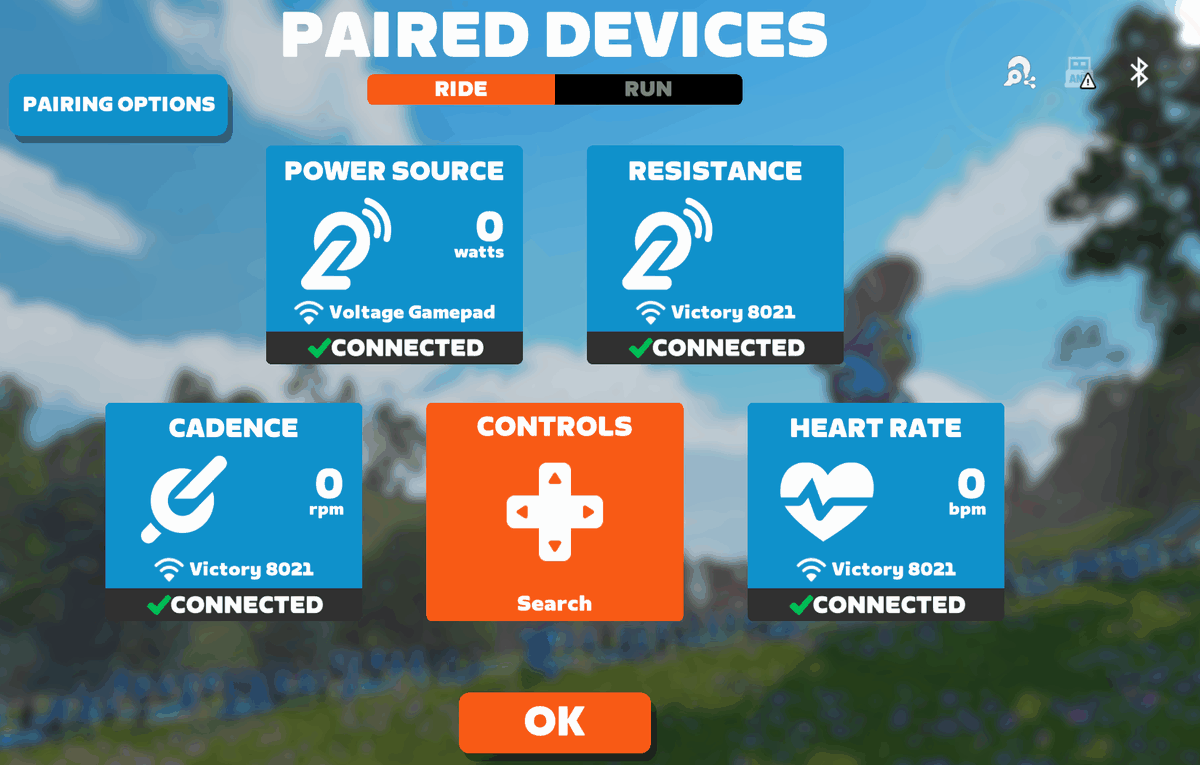
The Power Source tile now shows Voltage Gamepad as connected. This is only for a moment. Voltage Gamepad sends no power, so the tile shows 0 watts.
Why choose Power Source first?
Picking Voltage Gamepad as the Power Source triggers the communication handshake between Zwift and this app. This handshake needs to happen at least once per Zwift session to enable Controls integration. Once Controls is filled in, you can select your real Power Source. Voltage Gamepad does not send power or cadence. Your trainer must provide those.
5. Pick Voltage Gamepad under Controls
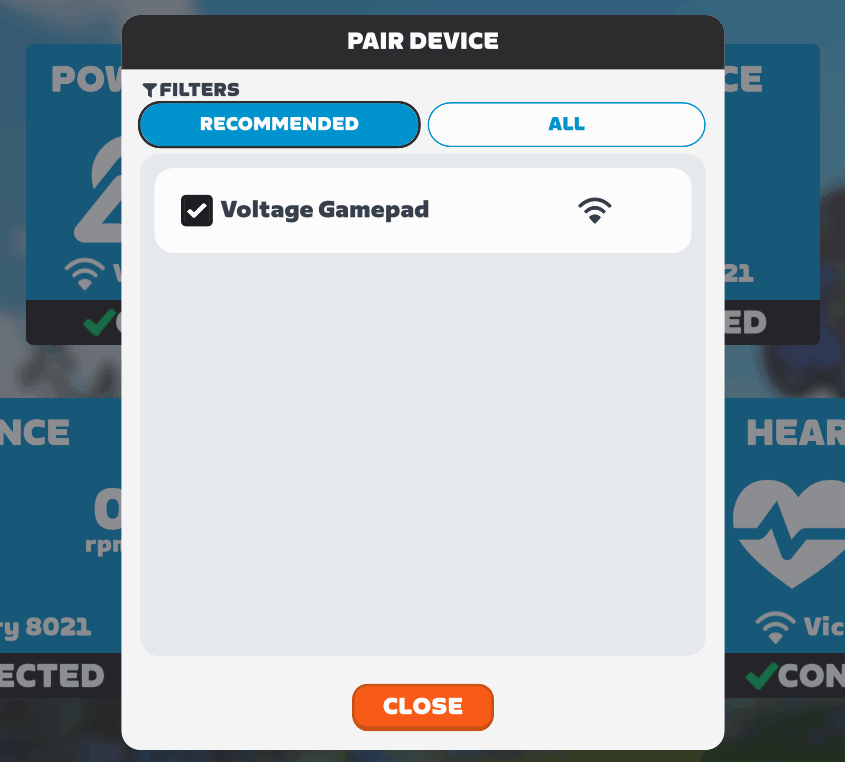
Click the Controls tile. In the Pair Device list, check Voltage Gamepad, then click Close.
6. Check the Controls tile
The Controls tile turns blue, shows a Zwift Ride handlebar icon and says Voltage Gamepad with Connected below it.
7. Go through the Zwift Ride tutorial (first time only)
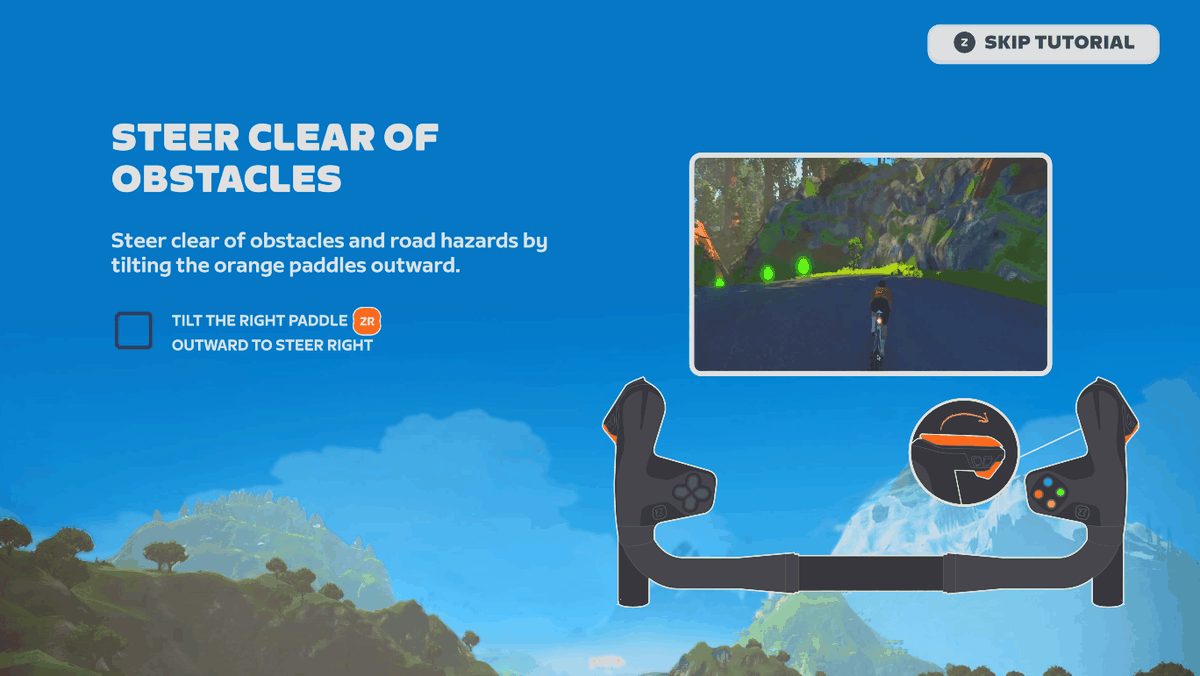
The first time Zwift sees a Zwift Ride, it runs a short tutorial. It starts with a welcome screen. Then it shows one screen per action, such as steering, braking and shifting. Do each action with your game controller, using the buttons you mapped in Map your controller. If you want to skip it, click Skip Tutorial in the top right corner or select the Z-mapped button on your controller.
8. Set the Power Source back to your trainer
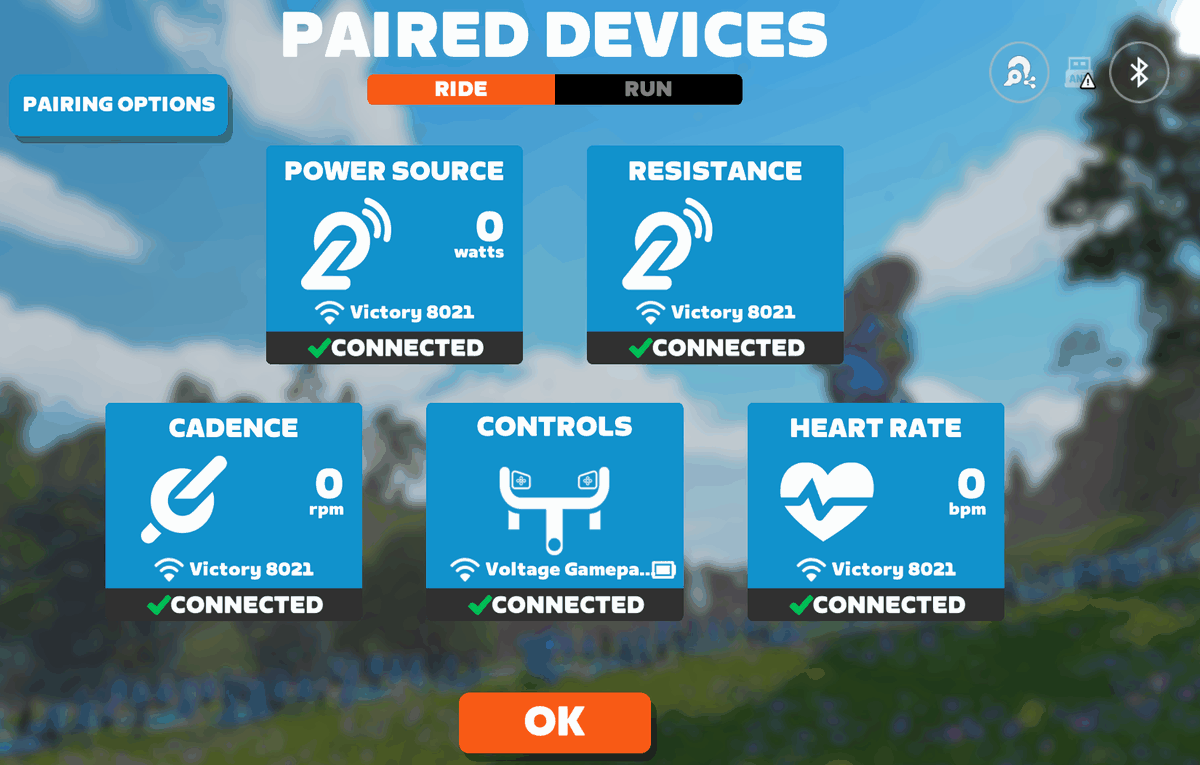
Click the Power Source tile again. Select your trainer or power meter, then click Close. Check that Resistance and Cadence also show your real devices. Keep Controls on Voltage Gamepad. Click OK and start riding!
flowchart TD
    a["Open the pairing screen"] --> b["Power Source: Voltage Gamepad"]
    b --> c["Controls:<br/>Voltage Gamepad"]
    c --> d["Power Source, Resistance, Cadence:<br/>your trainer"]
    d --> e["Controls stays on<br/>Voltage Gamepad"]
    e --> f["Ride On!"]
Next time
The tutorial only runs once. The handshake is needed once per Zwift session, though. So each time you start Zwift, repeat steps 3 to 6 and step 8: pick Voltage Gamepad as the Power Source, pick it under Controls, then set the Power Source back to your trainer.
What connected looks like
- On the pairing screen, Controls shows Voltage Gamepad as connected.
- In a ride, pressing your shift buttons changes gear, and pressing your navigation buttons moves through Zwift's menus.
- The app's log file records
DIRCON RideOn handshake completedwhen Zwift has connected. See Troubleshooting for where to find the log.
If Voltage Gamepad does not appear, see Troubleshooting.
Next step
Choose what each button does in Map your controller.